Irritrol Slim Dial Owners Manual: A Comprehensive Guide
This manual assists users in maximizing their product’s potential‚ offering guidance on setup‚ programming‚ troubleshooting‚ and maintenance of the Irritrol Slim Dial controller.
Welcome to the Irritrol Slim Dial Owners Manual! This controller is designed for efficient and reliable irrigation system management. The Slim Dial offers a user-friendly interface‚ simplifying programming and operation for both residential and light commercial applications. It’s a robust system built to withstand outdoor conditions‚ ensuring long-term performance.
This manual provides a comprehensive guide‚ from initial setup and wiring to advanced programming features like rain sensor compatibility and remote control options. Understanding the core concepts outlined here will empower you to optimize your watering schedules‚ conserve water‚ and maintain a healthy landscape. We’ll cover troubleshooting common issues‚ performing system tests‚ and preparing your controller for winter. The Irritrol Slim Dial is more than just a timer; it’s a smart irrigation solution.
Understanding the Basic Components
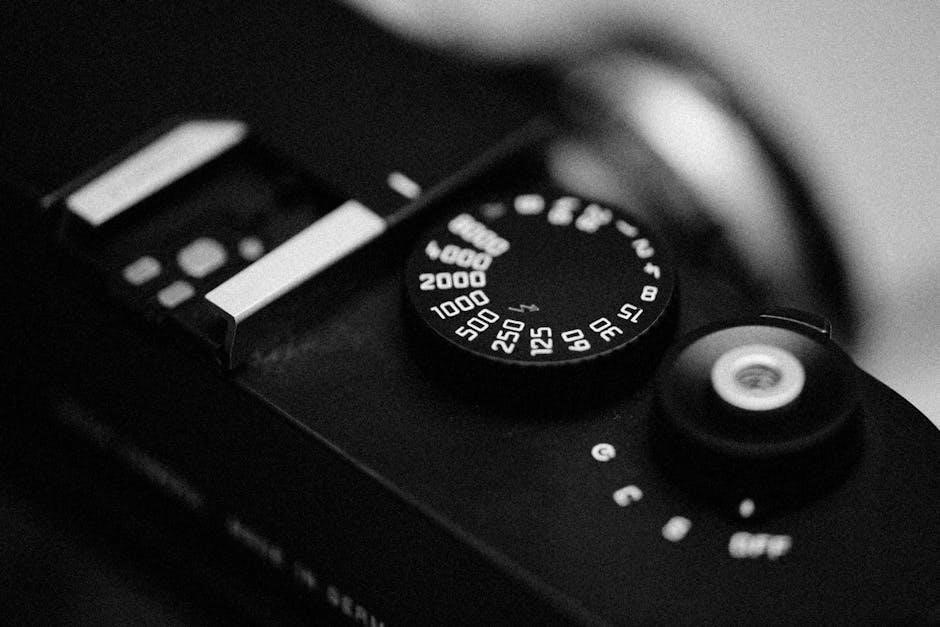
The Irritrol Slim Dial consists of several key components working in harmony; The central unit houses the controller’s programming interface – typically a dial for schedule adjustments and an LCD display for viewing settings. Valve connections‚ usually numbered‚ correspond to individual zones within your irrigation system. A power source‚ often a transformer‚ provides the necessary electricity.
Crucially‚ the controller interacts with solenoid valves‚ which open and close to control water flow to each zone. A common wire connects all valves‚ while individual zone wires link them to the controller. Understanding these connections is vital for proper installation and troubleshooting. External components like rain sensors connect via dedicated terminals‚ overriding schedules during wet weather. Familiarizing yourself with these parts ensures effective system management and maintenance.
Initial Setup and Installation
Before commencing installation‚ verify all components are present and undamaged. Mount the controller in a sheltered location‚ protecting it from direct sunlight and rain. Ensure easy access for programming and maintenance. Connect the controller to a grounded power source‚ utilizing the appropriate transformer.
Next‚ connect the valve wires‚ matching the controller terminals to the corresponding zone valves. A ‘common’ wire connects all valves. Double-check all wiring connections for security and correct polarity. If installing a rain sensor‚ connect it to the designated terminals. Before powering on‚ review all connections. Once powered‚ the display should illuminate‚ indicating successful initial setup. Proper installation is crucial for reliable operation and longevity of your Irritrol Slim Dial system.
Connecting to Water Source
Prior to connecting the water source‚ ensure the main water supply is shut off. Connect the controller’s inlet to the main water line using appropriate fittings and PVC pipe‚ ensuring a watertight seal. Install a backflow preventer to protect your potable water supply from contamination – this is often legally required.
Connect each zone valve to the controller’s outlet using appropriate piping. Before fully opening the main water supply‚ slowly introduce water to check for leaks at all connections. Tighten fittings as needed. Proper water pressure is vital; excessive pressure can damage the controller and valves. A pressure regulator may be necessary. Verify all connections are secure and leak-free before proceeding to programming;
Wiring Diagram Overview
The Irritrol Slim Dial utilizes a straightforward wiring system for connecting valves‚ sensors‚ and other accessories. Typically‚ each valve zone corresponds to a numbered terminal on the controller. Common wire colors are used for identification: white for common‚ and individual colors for each zone.
A dedicated terminal is provided for the rain sensor‚ often labeled “Sensor” or “SEN.” Ensure correct polarity when connecting the sensor. The controller requires a power source‚ typically 24VAC‚ connected to designated terminals. Always disconnect power before making any wiring changes. Refer to the detailed wiring diagram included with your controller for specific terminal locations and configurations. Incorrect wiring can cause malfunctions or damage the system. Double-check all connections before restoring power.
Programming the Controller: Core Concepts
The Irritrol Slim Dial’s programming revolves around defining watering schedules based on zones‚ days of the week‚ start times‚ and run durations. Understanding these core concepts is crucial for efficient water management. Zones represent individual areas of your landscape requiring separate watering. Schedules dictate when and for how long each zone receives water.
The controller allows for multiple independent programs‚ enabling customized watering for different landscape needs. Start times determine when a zone begins its watering cycle‚ while run times specify the duration of watering. Programming is typically done using the dial and buttons on the controller’s faceplate. Familiarize yourself with the menu structure and navigation to easily create and modify schedules. Proper programming minimizes water waste and promotes healthy plant growth.
Setting the Current Time and Date
Accurate time and date settings are fundamental for proper controller operation and automated scheduling. Before programming watering schedules‚ ensure the Irritrol Slim Dial displays the correct time and date. Typically‚ accessing the time/date setting involves pressing a “Set” or “Program” button‚ followed by navigating to the time and date options using the dial.
The controller usually allows setting the time in a 12-hour or 24-hour format. Date entry often requires specifying the month‚ day‚ and year. Confirm your selections carefully‚ as incorrect time/date settings will lead to inaccurate watering schedules. Some models may feature automatic daylight saving time adjustment. Once set‚ the controller will use this information to trigger watering cycles at the programmed times.
Programming Watering Schedules
Establishing watering schedules is the core function of the Irritrol Slim Dial controller. Access the programming mode using the “Program” or “Set” button. The controller allows for multiple independent schedules‚ enabling customized watering for different zones based on plant type and sun exposure.
Typically‚ you’ll select a program number‚ then define the start time‚ days of the week for watering‚ and the zones to include in that schedule. The Slim Dial’s interface utilizes the dial to navigate and adjust these parameters. Consider grouping zones with similar watering needs into the same schedule for simplified management. Review the programmed schedules carefully to ensure they align with your landscaping requirements and local water restrictions.

Adjusting Run Times and Frequency
Fine-tuning run times and frequency is crucial for efficient water usage and healthy plant growth. Within each programmed schedule‚ you can specify the duration of watering for each zone‚ typically measured in minutes. Use the “Adjust” or “+” and “-” buttons on the Slim Dial to modify these values.
Frequency refers to how often a schedule repeats – daily‚ weekly‚ or specific intervals. Consider factors like soil type‚ plant needs‚ and seasonal changes when setting these parameters. Observe your landscape for signs of over or under-watering‚ and adjust accordingly. Remember that shorter‚ more frequent watering cycles encourage deeper root growth. Regularly review and adjust schedules to optimize water conservation and maintain a thriving landscape.
Understanding Zone Configurations
Zone configurations define how your irrigation system divides your landscape into distinct watering areas. Each zone corresponds to a specific set of sprinklers or emitters‚ tailored to the unique needs of the plants in that area. The Irritrol Slim Dial allows you to program individual schedules for each zone‚ optimizing water delivery.
Proper zone configuration is vital for water conservation and plant health. Group plants with similar water requirements into the same zone. Consider factors like sun exposure‚ soil type‚ and plant species. Avoid mixing high-water-demand plants with drought-tolerant ones. Carefully map out your zones and label them accordingly for easy identification during programming and maintenance. This ensures efficient and targeted watering‚ promoting a lush and healthy landscape.
Troubleshooting Common Issues
Encountering problems with your Irritrol Slim Dial? Several common issues can arise. First‚ check the power supply – ensure the controller is receiving adequate voltage. If zones aren’t activating‚ verify the wiring connections to the valves and the controller itself. A faulty valve can prevent water flow to a specific zone; inspect for physical damage or electrical issues.
Display errors often indicate specific problems. Consult the controller’s error code list in this manual for detailed explanations and solutions. Low water pressure can also cause issues; check your main water supply and pressure regulator. If problems persist‚ a system reset might be necessary. Remember to document any changes made during troubleshooting for future reference.

Low Water Pressure Problems
Insufficient water pressure significantly impacts your irrigation system’s performance. Begin by verifying the main water supply pressure; it should ideally be between 40 and 60 PSI. A pressure regulator‚ if installed‚ needs inspection for proper function. Low pressure can manifest as weak sprinkler streams‚ reduced zone coverage‚ or complete failure to activate certain zones.
Check for obstructions in the water line‚ such as closed valves or debris buildup. Inspect the inlet screen of the controller for clogging; If multiple zones are affected‚ the issue likely lies upstream. For isolated zone problems‚ a faulty valve could be the culprit. Consider a professional plumbing assessment if the problem persists‚ as underlying issues with your water supply may require expert attention.

Valve Malfunction Diagnosis
A malfunctioning valve prevents water from reaching specific zones. Initial checks involve visually inspecting the valve for physical damage or leaks. Manually activate the valve using the solenoid override button; a clicking sound indicates solenoid operation‚ but doesn’t guarantee proper function. If no click is heard‚ the solenoid may be faulty.
If the valve clicks but doesn’t open‚ debris could be lodged within the valve body. Disassemble the valve (after shutting off the water supply!) and clean the internal components. Look for worn or damaged diaphragms‚ a common cause of valve failure. Replacement diaphragms are readily available. If issues persist after cleaning and component replacement‚ the entire valve assembly may need replacing. Always ensure proper wiring connections to the solenoid.
Controller Display Errors and Solutions
The Irritrol Slim Dial’s display provides error codes indicating system issues. A “Low Battery” message necessitates immediate battery replacement to prevent program loss. “Station Fault” suggests a wiring problem with a specific zone – check connections at both the controller and valve. A “Short Circuit” error indicates a wiring short‚ requiring careful inspection of all zone wiring.
“No Signal” often points to a faulty solenoid valve or wiring break. If the display shows garbled characters‚ a reset might be needed (consult the manual for the reset procedure). Regularly check the controller’s power supply and ensure it’s securely connected. Documenting error codes before attempting solutions aids troubleshooting. If errors persist after these steps‚ professional assistance may be required.
Performing a System Test
A system test verifies proper operation of each zone after installation or repairs. Initiate a manual run for each zone through the controller’s programming interface. Observe each sprinkler head‚ ensuring it pops up fully and delivers water with adequate pressure and correct spray pattern. Check for leaks at the valve and along the lateral lines.

Listen for unusual noises‚ which could indicate debris or damaged components. Note any zones with insufficient pressure or malfunctioning heads. Document any issues discovered during the test for prompt repair. Repeat the test after making adjustments or repairs to confirm resolution. A thorough system test prevents future problems and optimizes irrigation efficiency.
Winterization Procedures
Protecting your irrigation system from freezing temperatures is crucial. Begin by shutting off the main water supply to the controller. Manually run each zone until all water has drained from the pipes‚ preventing potential bursts. Disconnect the backflow preventer and drain it thoroughly‚ removing any remaining water.

If applicable‚ disconnect and store the rain sensor to prevent damage. For controllers with battery backups‚ remove the batteries to avoid corrosion. Inspect valve boxes for standing water and remove any debris. Consider blowing out the lines with compressed air for added protection in colder climates. Proper winterization ensures a hassle-free start-up in the spring.
Advanced Features and Settings
The Irritrol Slim Dial offers features beyond basic scheduling. Explore “Seasonal Adjust” to uniformly increase or decrease run times based on weather patterns‚ conserving water. Utilize “Master Valve” functionality for a main shut-off control‚ enhancing safety and simplifying maintenance. Program individual start times for each zone‚ optimizing water distribution based on sun exposure and plant needs.
Consider enabling “Cycle and Soak” to prevent runoff on sloped areas or with heavy clay soils. The controller supports a rain sensor‚ automatically suspending irrigation during rainfall. Advanced users can customize program names for easy identification. These settings provide precise control‚ maximizing efficiency and promoting a healthy landscape.
Rain Sensor Compatibility
The Irritrol Slim Dial is designed to seamlessly integrate with most wired rain sensors‚ enhancing water conservation efforts. Connect the sensor wires to the designated terminals – typically labeled “Sensor” or “SEN” – within the controller’s wiring compartment. Ensure the sensor is properly positioned to accurately detect rainfall‚ ideally in an open area away from obstructions.
Once connected‚ the controller will automatically suspend scheduled irrigation when the rain sensor detects a predetermined amount of rainfall. You can often adjust the sensitivity of the sensor to match local rainfall patterns. Proper installation and configuration are crucial for optimal performance. Refer to the rain sensor’s specific manual for detailed instructions and troubleshooting tips. This feature significantly reduces water waste.
Remote Control Options
While the standard Irritrol Slim Dial doesn’t natively support direct remote control via a dedicated handheld device‚ several smart home integration pathways exist. Users can leverage aftermarket smart irrigation controllers that are compatible with the Slim Dial’s wiring. These systems often connect to your home’s Wi-Fi network‚ enabling control through smartphone apps or voice assistants.
Alternatively‚ some advanced users employ relay modules connected to a smart home hub to remotely activate or deactivate individual zones. This requires a degree of technical expertise in electrical wiring and programming. Always prioritize safety and consult with a qualified electrician if you’re unsure about any aspect of the installation. Exploring these options provides convenient‚ off-site control of your irrigation system.
Maintenance and Cleaning
Regular maintenance ensures the longevity and optimal performance of your Irritrol Slim Dial controller. Periodically inspect the unit for dust and debris accumulation‚ especially within the battery compartment and around the wiring terminals. Use a soft‚ dry cloth to gently wipe down the exterior; avoid harsh chemicals or abrasive cleaners‚ as these can damage the plastic casing.
Check the wiring connections annually to ensure they remain secure and free from corrosion. Inspect the valve wires for any signs of damage or fraying. Before winterizing‚ thoroughly clean the controller’s exterior and ensure it’s dry before storing it in a frost-free location. Simple preventative care will minimize potential issues and extend the life of your irrigation system’s brain.