IntelliSwab Rapid Test Instructions: A Comprehensive Guide
This guide details using the IntelliSwab for quick results, aiding in informed decisions about health and well-being, leveraging AI-driven insights.
Understanding the IntelliSwab Rapid Test
The IntelliSwab Rapid Test is a lateral flow assay designed for the qualitative detection of specific antigens, offering a swift diagnostic tool. It’s crucial to recognize this test isn’t a replacement for PCR testing, particularly when high accuracy is paramount. However, its speed and accessibility make it valuable for initial screening and rapid decision-making.
Understanding its limitations is key; a negative result doesn’t entirely rule out infection, and positive results should be confirmed with a more sensitive laboratory test. The test functions by identifying specific proteins associated with the target pathogen within a nasal sample. Proper execution of the test, following the provided instructions meticulously, is vital for reliable results.
What is the IntelliSwab Rapid Test Used For?
The IntelliSwab Rapid Test serves as a preliminary diagnostic tool for detecting the presence of specific antigens, aiding in the quick identification of potential infections. It’s primarily utilized for rapid screening purposes, offering results within a short timeframe – typically 15-30 minutes. This makes it valuable in situations requiring immediate assessment, such as point-of-care settings or initial self-testing.
However, it’s important to note that the test isn’t intended for definitive diagnosis. Positive results should always be confirmed by a more accurate laboratory test, like PCR. The test is useful for individuals experiencing symptoms, or those who have been exposed to someone with a confirmed infection, to quickly assess their status and take appropriate action.
Key Components of the IntelliSwab Kit
Each IntelliSwab kit typically includes several essential components for accurate testing. These generally comprise a sterile nasal swab, designed for comfortable sample collection, and a pre-filled extraction tube containing a stabilizing solution. Crucially, the kit also features a test device – a cassette with a result window – and a disposable dropper or pipette for precise reagent transfer.
Furthermore, a detailed instruction leaflet is provided, guiding users through each step of the process. Some kits may also include a tube holder for stability during processing. It’s vital to verify that all components are present and undamaged before commencing the test, ensuring reliable and valid results.
Preparing for the Test
Before initiating the IntelliSwab test, careful preparation is paramount for accurate results. Begin by selecting a clean, well-lit, and ventilated area, free from distractions. Allow the entire kit to reach room temperature for at least 30 minutes, as temperature can affect test performance.
Review the complete instructions thoroughly to understand each step. Gather all necessary materials – the kit itself, a timer, and a suitable surface for laying out components. Avoid eating, drinking, or smoking for at least 15 minutes prior to sample collection to prevent contamination and ensure a reliable outcome.
Hand Hygiene and Safety Precautions
Maintaining strict hand hygiene is crucial before, during, and after performing the IntelliSwab test. Thoroughly wash your hands with soap and warm water for at least 20 seconds, or use an alcohol-based hand sanitizer containing at least 60% alcohol. This minimizes the risk of contamination, ensuring test accuracy and personal safety.
Treat all sample materials as potentially infectious. Avoid touching your face, eyes, or mouth during the procedure. If you accidentally come into contact with nasal secretions or the swab, wash the affected area immediately. Dispose of used components responsibly, following the guidelines provided in the kit’s instructions to prevent the spread of any potential pathogens.
Gathering Necessary Materials
Before commencing the IntelliSwab test, ensure you have all required components readily available. This includes the IntelliSwab test kit itself, containing the swab, reagent tube, and test device; You’ll also need a timer or clock to accurately track incubation periods. A clean, flat surface is essential for performing the test without contamination.
Additionally, have a biohazard disposal bag prepared for safe disposal of used materials. Ensure adequate lighting to clearly visualize the test results. Finally, access to the instructions for use is vital for proper execution and interpretation. Having everything prepared beforehand streamlines the process and minimizes errors.
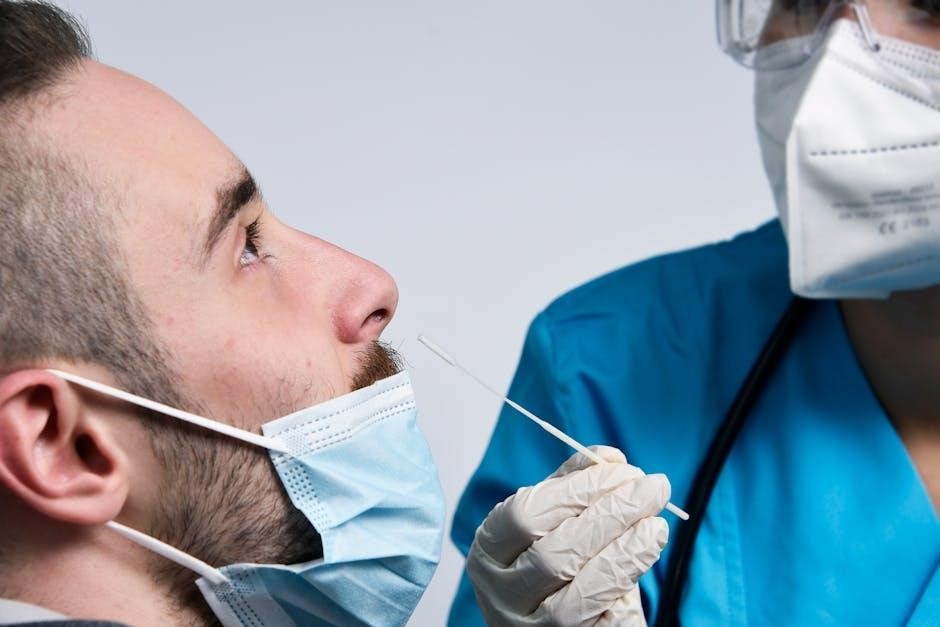
Performing the Nasal Swab
To begin, gently open the IntelliSwab package, avoiding contact with the swab tip. Carefully insert the entire swab into one nostril, approximately 1-2 centimeters (0.4-0.8 inches) – this depth is crucial for adequate sample collection.
Slowly rotate the swab against the inside wall of your nostril at least five times. Repeat the swabbing process in the other nostril using the same swab. This ensures a comprehensive sample. Remove the swab carefully, avoiding touching the tip. Immediately place the swab into the provided reagent tube, ensuring it’s fully submerged.
Correct Swab Technique – Depth and Rotation
Achieving an accurate result hinges on proper swabbing. Insert the IntelliSwab approximately 1-2 cm (0.4-0.8 inches) into the nostril – discomfort indicates you’ve gone too far. Gentle, yet firm, pressure is key.
Rotate the swab at least five complete circles against the nasal wall. This action dislodges and collects crucial sample material. Repeat identically in the second nostril, using the same swab. Consistent rotation and depth are paramount. Avoid forceful insertion or excessive rubbing, which can cause irritation and inaccurate results. Proper technique maximizes sample collection.
Ensuring Adequate Sample Collection
Successful testing relies on obtaining a sufficient sample. After swabbing both nostrils, visually inspect the swab for visible nasal discharge. A lack of visible material doesn’t necessarily invalidate the test, but warrants careful processing.
Gently rotate the swab within the provided extraction tube, ensuring complete contact with the reagent solution. Vigorously mix the swab within the tube for at least 10 seconds, squeezing the sides to release any trapped sample. Adequate mixing is critical for accurate detection. Insufficient sample can lead to false negatives, so thorough extraction is essential.
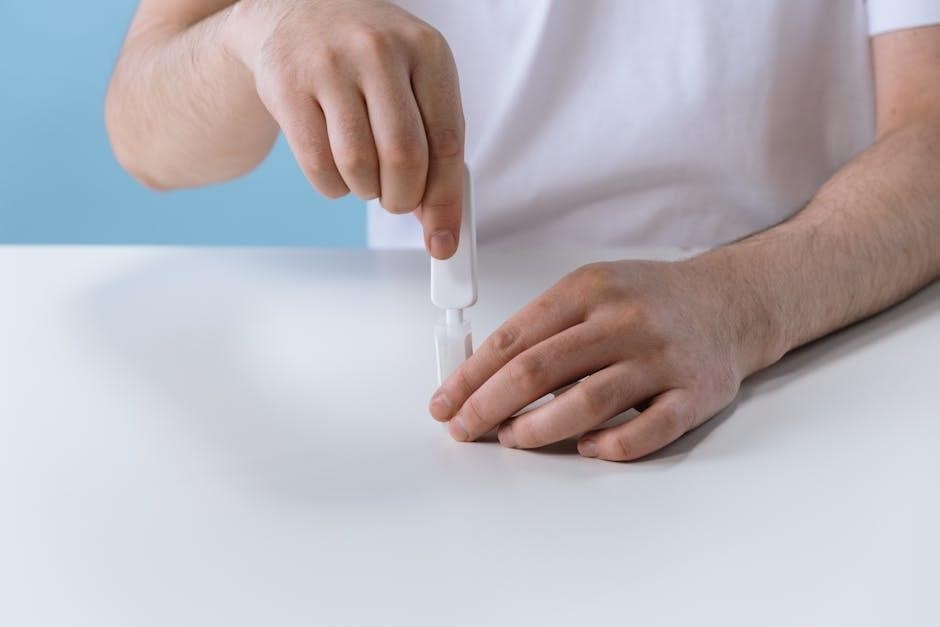
Processing the Test
Following sample collection, immediate processing is crucial for reliable results. Carefully remove the swab from the extraction tube, discarding it responsibly. Securely attach the provided dropper cap to the tube, avoiding any contact with the liquid.
Dispense precisely the specified number of drops (typically 2-3, refer to kit instructions) into the test device’s sample well. Initiate the timer immediately after adding the sample. Avoid cross-contamination by using a new dropper for each test. Proper execution of this step is vital for accurate interpretation.
Adding Reagent Solution to the Tube
After securing the dropper cap, gently add the entire contents of the reagent tube into the extraction tube containing the swab sample. Avoid creating bubbles during this process, as they can interfere with accurate results.
Close the tube tightly, ensuring a secure seal to prevent leakage. Gently rotate the tube several times (usually 5-10 rotations) to thoroughly mix the sample and reagent solution. This mixing action is essential for releasing the target antigen and enabling detection.
Incubation Period and Temperature
Following reagent addition and mixing, allow the test to incubate for the specified duration – typically 15-20 minutes, but always confirm the exact time on your kit’s instructions. Maintaining the correct temperature is crucial for accurate results; room temperature (approximately 68-77°F or 20-25°C) is generally recommended.
Avoid exposing the test to extreme temperatures or direct sunlight during incubation, as this can compromise the test’s integrity. A stable environment ensures optimal reaction conditions for antigen-antibody binding, leading to a reliable outcome. Do not proceed to read results before the incubation period is complete.
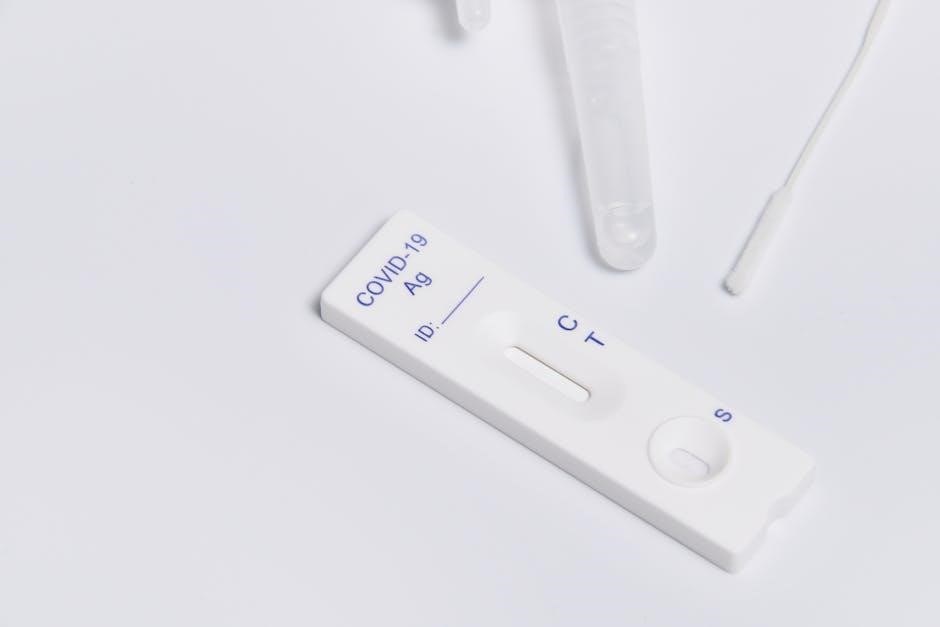
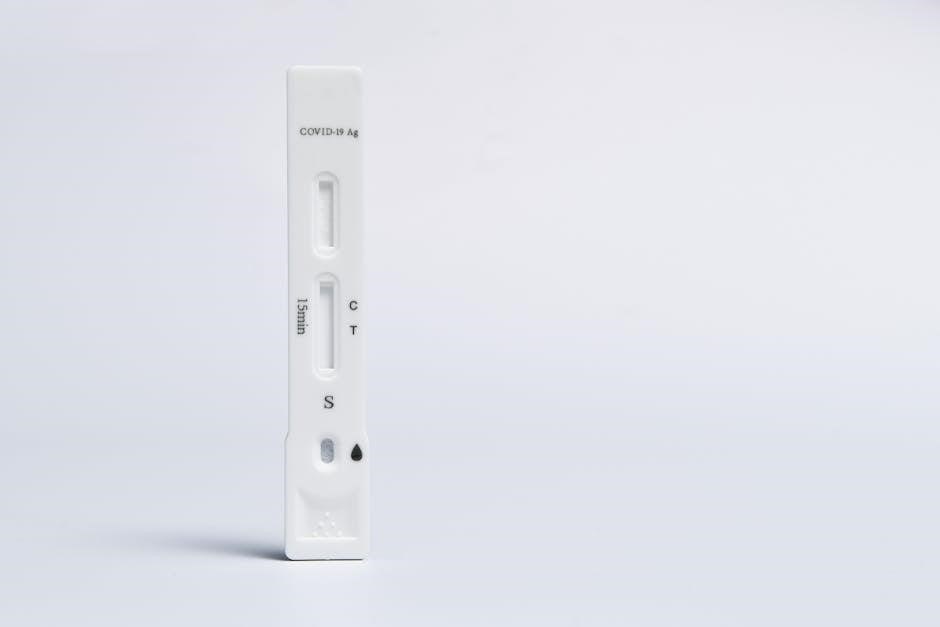
Interpreting the Results
Carefully observe the test device after the incubation period. Results are typically read within a specific timeframe, usually 15-30 minutes, to ensure accuracy. The presence of lines indicates the test outcome. A control line must appear for the test to be valid; its absence signifies an invalid result, requiring a repeat test with a new kit.
The test line’s intensity doesn’t necessarily correlate with the viral load. Any visible test line, even faint, is generally considered a positive result, indicating the presence of the antigen. Absence of the test line, alongside a visible control line, suggests a negative result.
Understanding the Control Line
The control line is a crucial element for validating the IntelliSwab test. It serves as a built-in quality control, confirming the test was performed correctly and the reagents are functioning properly. This line must appear regardless of whether the sample is positive or negative.
Its presence indicates sufficient sample volume was added and the test strip is working as intended. If the control line is absent, the test result is considered invalid, even if a test line appears. An absent control line suggests a problem with the test kit or the procedure, necessitating a repeat test using a fresh kit.
Reading the Test Line – Positive vs. Negative
Interpreting the test line is straightforward, but precise. A positive result is indicated by the appearance of a visible test line, even if faint, alongside the control line. Any visible line, however subtle, within the designated reading window signifies a positive detection.
Conversely, a negative result is shown only by the presence of the control line, with no test line visible. The absence of any color in the test region, despite a clear control line, confirms a negative result. Remember to read the results within the specified timeframe – typically 15-30 minutes – as results beyond this window may be inaccurate.
Troubleshooting Common Issues
Encountering issues? Several factors can affect test validity. If no control line appears, the test is invalid and must be repeated with a new kit, ensuring sufficient sample volume was collected initially. A faint control line suggests insufficient reagent or improper procedure – retest carefully.
Weak positive results require careful consideration. While any visible test line indicates a positive result, a very faint line might warrant retesting or confirmation with a more sensitive PCR test. Ensure proper storage of the kit and avoid expired components. Network issues or proxy configurations can sometimes mimic test errors, so verify connectivity.
Invalid Test Results – Possible Causes
An invalid result, indicated by a missing control line, signals a problem. Common causes include insufficient sample collection – ensure the swab reaches the correct depth and is rotated adequately. Expired or damaged test kits will also yield invalid results; always check the expiration date before use.
Improper reagent addition or incorrect incubation times can prevent the control line from appearing. Furthermore, issues with the testing environment, like extreme temperatures, or user error during the procedure can contribute to invalidity. If consistently experiencing invalid results, consider network connectivity issues impacting the test’s digital components.
Weak Positive Results – What to Do
A faint test line, indicating a weak positive result, requires careful consideration. It doesn’t definitively confirm or rule out infection; retesting with a fresh kit is strongly recommended to verify the initial finding. Ensure proper swab technique and reagent application during the repeat test.
If the repeat test also shows a weak positive, or if symptoms are present, it’s crucial to seek further medical advice and potentially undergo a more sensitive PCR test for confirmation. Network issues or proxy configurations shouldn’t affect the test line’s visibility, but always confirm kit integrity. Don’t rely solely on a weak positive for critical decisions.
Important Considerations and Limitations
The IntelliSwab, while convenient, has limitations. Rapid antigen tests are generally less sensitive than PCR tests, meaning they may miss early infections or cases with low viral loads. False negatives are possible, particularly if the test is performed incorrectly or too early in the infection.
Factors like network connectivity shouldn’t impact test accuracy, but proper storage and handling are vital. This test is a screening tool, not a definitive diagnosis. Always consider your symptoms, exposure history, and local health guidelines. If concerns persist, consult a healthcare professional for further evaluation and confirmation via a more accurate testing method.
Accuracy and Sensitivity of the Test
The IntelliSwab’s accuracy, like all rapid antigen tests, isn’t absolute. Sensitivity – its ability to correctly identify positive cases – can vary based on viral load and timing of the test. Generally, it performs best when tested during peak infection. Specificity, the ability to correctly identify negative cases, is typically higher.
Understanding these metrics is crucial. A negative result doesn’t guarantee you’re infection-free, and a positive result should be confirmed with a PCR test, especially for critical decisions. Factors like proper sample collection significantly impact accuracy. Always follow instructions carefully to maximize reliable results.
When to Seek Further Medical Advice
Regardless of your IntelliSwab result, consult a healthcare professional if symptoms worsen or persist. A positive result necessitates confirmation with a PCR test and guidance on isolation protocols. Even a negative result doesn’t exclude infection, particularly if you exhibit symptoms or have known exposure.
Seek immediate medical attention for severe symptoms like difficulty breathing, persistent chest pain, confusion, or bluish lips or face. The IntelliSwab is a screening tool, not a definitive diagnosis. Professional medical evaluation is vital for accurate diagnosis and appropriate treatment plans, ensuring optimal health outcomes.
Storage and Disposal
Store IntelliSwab kits in a cool, dry place, away from direct sunlight and extreme temperatures. Ensure the kit remains sealed until use to maintain reagent stability and test accuracy. Do not freeze the kit components, as this can compromise their effectiveness.
Dispose of used test components responsibly. Place swabs, tubes, and any contaminated materials in a sealed plastic bag before discarding them in your regular waste. Follow local regulations for medical waste disposal if applicable. Wash your hands thoroughly after handling used test materials to prevent potential contamination.
Proper Storage of IntelliSwab Kits
Maintaining optimal storage conditions is crucial for IntelliSwab kit performance. Store unopened kits at room temperature, ideally between 39°F and 86°F (4°C and 30°C). Avoid exposure to humidity, as it can degrade the reagents. Keep the kit away from direct sunlight and sources of heat.
Ensure the packaging remains sealed until the moment of use. Once opened, use the kit immediately or reseal it carefully to minimize exposure to air. Do not freeze the kit, as freezing can damage the sensitive components and invalidate test results. Proper storage guarantees reliability.
Safe Disposal of Used Test Components
Proper disposal of used IntelliSwab components is essential for safety and environmental responsibility. Treat all used materials – swab, tube, and packaging – as biohazardous waste. Place them in a sealed, labeled biohazard bag or a puncture-resistant container.
Follow your local regulations for biohazardous waste disposal. Do not dispose of these items in regular trash. Contact your local health department or waste management services for guidance on appropriate disposal methods. Thorough handwashing after handling used components is vital. Responsible disposal protects both people and the environment.
Frequently Asked Questions (FAQ)
Q: Can the IntelliSwab test be used for asymptomatic individuals? A: While it can detect the presence of the target, testing asymptomatic individuals may yield lower accuracy. Consult healthcare professionals for guidance.
Q: What should I do if I get a positive result? A: Isolate immediately and contact your healthcare provider for confirmation and further instructions. Follow their guidance regarding testing, treatment, and contact tracing. A positive result requires professional medical evaluation.
Q: What if my test is invalid? A: Repeat the test with a new kit, ensuring you follow all instructions carefully. If the issue persists, contact support.
Can the IntelliSwab test be used for asymptomatic individuals?
The IntelliSwab can technically be used on those without symptoms, but interpretation requires caution. Viral loads are generally lower in asymptomatic cases, potentially leading to false negatives. Therefore, a negative result doesn’t definitively rule out infection if symptoms develop later.
Testing asymptomatic individuals is often part of broader screening programs, particularly in high-risk settings. However, relying solely on IntelliSwab for asymptomatic screening isn’t recommended. Healthcare professionals can provide personalized advice based on individual risk factors and local prevalence rates. Consider confirmatory testing if exposure is suspected.
What should I do if I get a positive result?
A positive IntelliSwab result indicates the presence of the target antigen, suggesting a likely infection. Immediately self-isolate to prevent further spread, even if symptoms are mild or absent. Contact your healthcare provider for guidance on confirmatory testing, such as a PCR test, which is more sensitive.
Follow your healthcare provider’s recommendations regarding treatment and monitoring. Inform close contacts about your positive result so they can get tested and take appropriate precautions. Adhere to local public health guidelines regarding isolation and quarantine. Document your result and any related medical advice for future reference.