Aviva Glucose Meter Manual: A Comprehensive Guide

This guide provides detailed instructions for the Aviva Plus meter, covering setup, testing, troubleshooting, and maintenance. Download the full user manual and quick start guides in multiple languages for optimal use.
The Aviva Plus blood glucose monitoring system is a vital tool for individuals managing diabetes, enabling convenient and accurate self-testing at home. Designed for ease of use, this system empowers users to proactively monitor their blood glucose levels and make informed decisions about their health. This meter is an in vitro diagnostic device, meaning it analyzes samples outside the body.
Understanding your blood glucose readings is crucial for effective diabetes management. The Aviva Plus meter provides clear and reliable results, assisting you in tracking trends and identifying potential issues. Beyond basic testing, the system offers features like customizable high/low alerts and data memory to review past results.
Furthermore, the Aviva Plus seamlessly integrates with the MySugr app, allowing for effortless data logging and sharing with healthcare professionals. This comprehensive system, coupled with the provided manual, aims to simplify blood glucose monitoring and contribute to improved health outcomes.

Understanding the Aviva Plus Meter Features
The Aviva Plus meter boasts several key features designed to enhance the user experience and improve diabetes management. A prominent feature is its ability to be customized with personalized high and low blood glucose range settings. This allows users to receive alerts when their results fall outside their target range, aiding in proactive care.
The meter also includes a substantial memory function, storing previous test results for easy review and trend analysis. This historical data is invaluable for identifying patterns and discussing progress with healthcare providers. Integration with the MySugr app further expands data management capabilities, offering seamless logging and sharing.
Additionally, the Aviva Plus supports the use of control solution, enabling users to verify the accuracy of the meter and test strips. The system’s automatic on function upon battery insertion streamlines the initial setup process, making it user-friendly from the start.
Kit Contents and Initial Setup
Upon opening your Aviva Plus kit, ensure all components are present. Typically, this includes the Aviva Plus meter itself, a lancing device, lancets, test strips, a control solution, batteries, and the user manual. Carefully inspect each item for any damage before proceeding.
Initial setup is straightforward. Begin by inserting the provided batteries into the meter. The device should power on automatically, displaying the date and time settings which will require adjustment. Familiarize yourself with the meter’s buttons and display screen, referencing the user manual for detailed explanations of each function.
Before performing your first blood glucose test, it’s crucial to properly set the date and time for accurate record-keeping. Also, understand the function of the control solution – it verifies the meter and strips are working correctly. A quick start guide is also included for simplified initial operation;
Inserting Batteries and Powering On
The Aviva Plus meter requires batteries for operation. Typically, it uses two AAA batteries, though always confirm the specific type in your user manual. Locate the battery compartment, usually on the back or side of the meter, and open it according to the instructions.
Insert the batteries, paying close attention to the polarity markings (+ and -) inside the compartment. Incorrect insertion will prevent the meter from powering on. Once the batteries are securely in place, close the compartment.
The meter should automatically power on after battery insertion. If it doesn’t, double-check the battery polarity and ensure they are fresh. Upon powering on, the display will likely show a welcome message and prompt you to set the date and time. The last two digits of the year will flash, indicating the setup mode has begun.
Setting the Date and Time
After inserting the batteries and powering on, the Aviva Plus meter will prompt you to set the date and time. The year’s last two digits will initially flash on the display. Use the designated buttons – often labeled “Up” and “Down” or similar – to adjust the digits to the correct year.
Press the “Next” or “Confirm” button to move to the month setting. Again, use the adjustment buttons to select the correct month, and confirm. Continue this process for the day, hour, and minute settings, carefully verifying each selection.
Accurate date and time settings are crucial for proper record-keeping and tracking of your blood glucose results. Some meters may offer a 12- or 24-hour time format option; select your preference. Once all settings are confirmed, the meter will save the information and return to the main display, ready for testing.
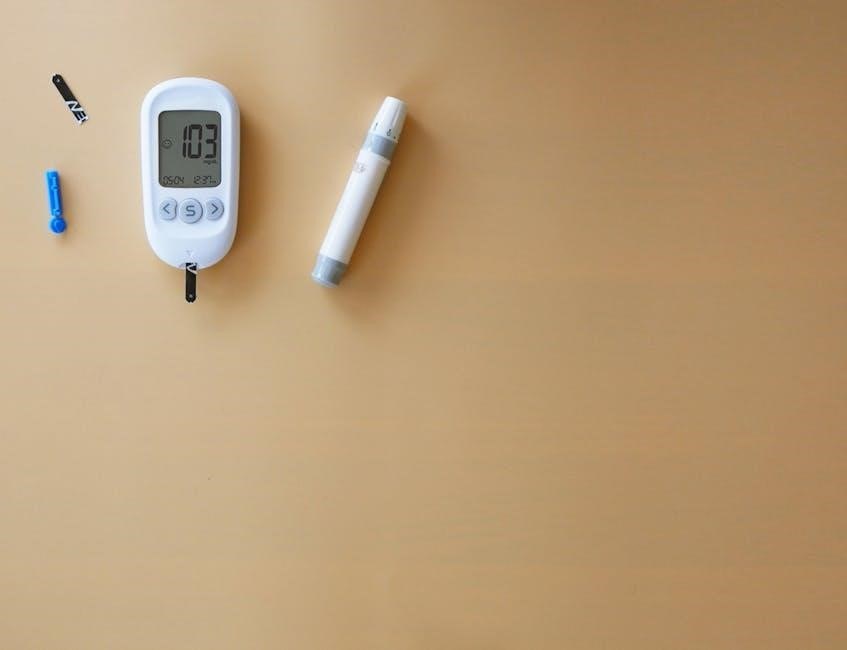
Applying a Test Strip
Before performing a blood glucose test with the Aviva Plus meter, correctly applying a test strip is essential. Locate the test strip port, typically on the front or side of the device. Ensure your hands are clean and dry. Gently remove a single test strip from the vial, avoiding touching the metallic contact strip with your fingers.
Immediately insert the test strip fully into the port, matching the orientation indicated by the meter’s display or markings on the strip itself. The meter will usually power on automatically or display a prompt confirming the strip is recognized.
A small amount of blood is needed for accurate results, so ensure the strip is properly seated. The meter is now ready to receive the blood sample. Do not reuse test strips, as this can lead to inaccurate readings. Always use a fresh strip for each test.
Understanding Control Solution
Control solution is a vital component for verifying the accuracy of your Aviva Plus meter and test strips. It simulates blood glucose levels, allowing you to confirm the system is functioning correctly, independent of your blood glucose readings.
Regularly performing control solution tests – especially after opening a new vial of test strips, or if you suspect the meter is malfunctioning – is highly recommended. Follow the instructions provided with your specific control solution, as procedures can vary slightly.
Typically, you’ll apply a drop of control solution to a test strip, just as you would with a blood sample. The meter will then display a result. Compare this result to the range printed on the control solution vial. If the result falls within the specified range, your meter is working accurately. If not, troubleshoot the issue or contact customer support.
Performing a Blood Glucose Test
Before testing, ensure your hands are clean and dry. Insert a test strip firmly into the meter; the meter typically activates automatically. The display will show a flashing symbol, indicating it’s ready for the blood sample;
Using the lancing device, obtain a small blood droplet. Gently touch the edge of the test strip to the blood drop – the strip will draw the sample in. Avoid smearing the blood, as this can affect the result.
The meter will begin counting down, displaying the remaining seconds until the result appears. Do not disturb the meter or the test strip during this process. Once complete, your blood glucose level will be displayed on the screen. Record the result for tracking purposes.
Applying the Blood Sample
After obtaining a small blood droplet with the lancing device, gently bring the edge of the Aviva test strip into contact with the blood. The strip is designed to wick the blood sample automatically; do not apply excessive pressure or smear the blood.
Ensure the blood fills the designated sample area on the test strip. Insufficient blood can lead to an error message or inaccurate reading. Avoid applying blood to the sides of the strip, as this may also cause errors.
The meter will display a countdown timer once the blood sample is applied, indicating the analysis is in progress. Do not add more blood to the strip during this time. Maintain a stable position of the meter and strip until the result is displayed.
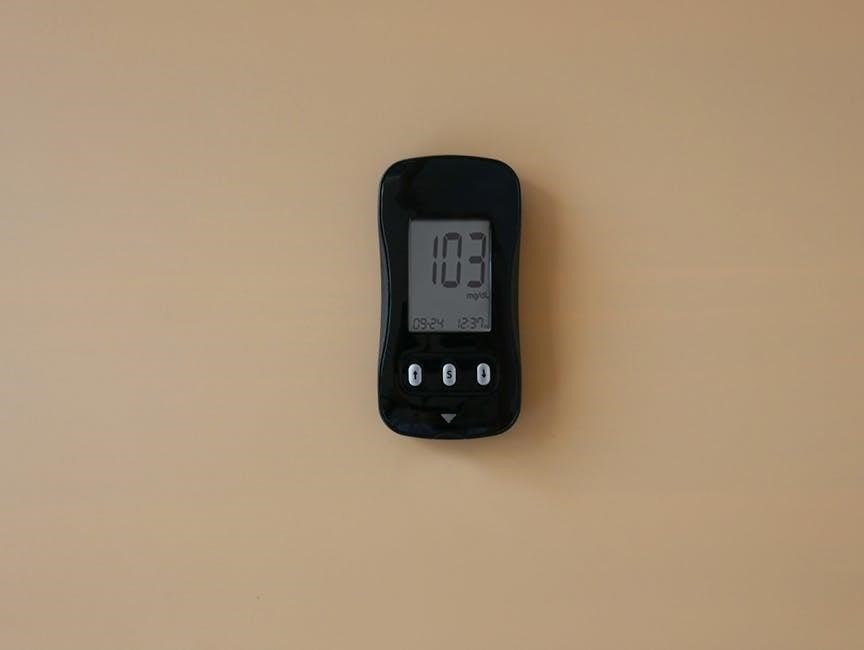
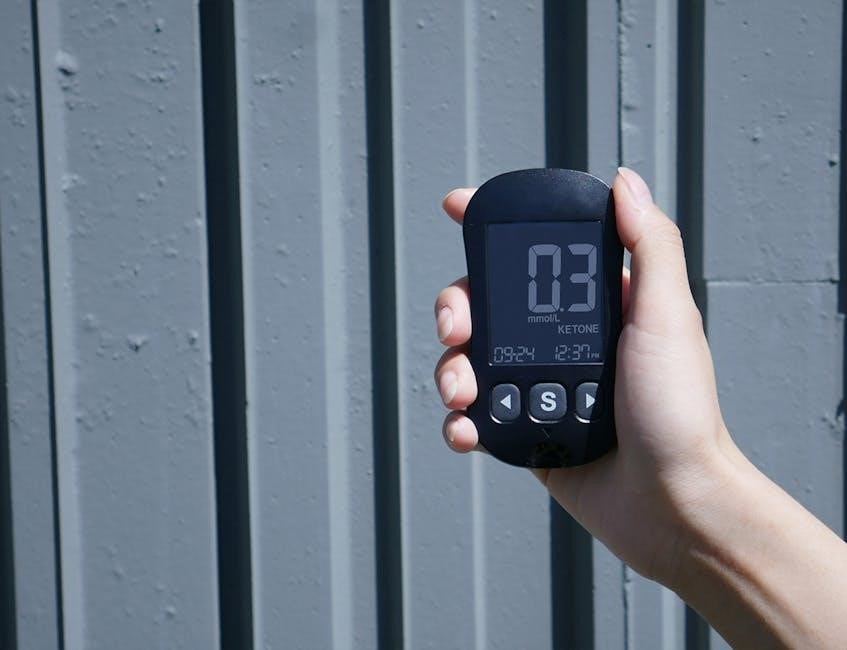
Reading and Interpreting Results
Once the analysis is complete, your blood glucose level will be displayed prominently on the Aviva Plus meter screen. The result is shown in milligrams per deciliter (mg/dL). Record this value in your logbook or, if connected, within the MySugr app for tracking purposes.
Pay attention to any indicators displayed alongside the result. The meter may indicate if the reading is high or low based on your personalized target range settings. Familiarize yourself with these indicators to quickly assess your glucose level.
Remember that results should be interpreted in consultation with your healthcare provider. They can help you understand your readings in the context of your overall diabetes management plan. Consistent monitoring and interpretation are key to effective control.
High and Low Blood Glucose Indicators
The Aviva Plus meter is designed to alert you to potentially dangerous glucose levels. You can customize the meter to notify you when a result indicates possible hypoglycemia, or low blood sugar. This setting allows you to define the specific blood sugar level that triggers the alert.
Conversely, the meter will also indicate high blood glucose readings. These indicators are visual cues – often symbols or color-coding – displayed alongside your numerical result; Understanding these indicators is crucial for prompt action.
If a “high” or “low” indicator appears, immediately assess your situation. Follow the guidance of your healthcare provider regarding appropriate steps to take, such as adjusting food intake or medication. Consistent awareness of these indicators supports proactive diabetes management.
Memory Function and Reviewing Past Results
The Aviva Plus meter conveniently stores your blood glucose readings, allowing you to track your progress over time. This memory function is a valuable tool for identifying trends and patterns in your glucose levels. To access past results, use the meter’s navigation buttons to scroll through your testing history.
The meter typically displays the date and time alongside each reading, providing context for your results. You can review average readings over specific periods, such as 7, 14, or 30 days, offering a broader perspective on your glucose control.
Regularly reviewing your stored data, in conjunction with your healthcare provider, helps refine your diabetes management plan. This feature empowers you to make informed decisions about your diet, exercise, and medication, ultimately leading to better health outcomes.
Using the Aviva Plus with MySugr App
The Aviva Plus meter seamlessly integrates with the MySugr app, enhancing your diabetes management experience. This connection allows for automatic data transfer of your blood glucose readings from the meter to your smartphone or tablet, eliminating manual logging.
MySugr provides a comprehensive suite of features, including detailed graphs, personalized insights, and the ability to share your data with your healthcare team. You can also log meals, exercise, and medication, creating a holistic view of factors influencing your glucose levels.
The app offers helpful reminders for testing, medication, and appointments, promoting adherence to your treatment plan; Furthermore, MySugr’s user-friendly interface and engaging design make tracking your diabetes more manageable and less daunting, empowering you to take control of your health.
Troubleshooting Common Issues
Encountering issues with your Aviva Plus meter is common; however, many problems have simple solutions. If the meter doesn’t turn on, ensure the batteries are correctly inserted and have sufficient charge. For error codes, refer to the dedicated section in the manual to understand their meaning and recommended actions.
Inaccurate readings can often be traced to improper testing technique, expired test strips, or a dirty meter. Always verify the test strip expiration date and clean the meter regularly. If control solution results are outside the expected range, repeat the test or contact customer support.
Connectivity problems with the MySugr app can usually be resolved by ensuring Bluetooth is enabled and the app has the necessary permissions. Remember to consult the full user manual for a comprehensive list of troubleshooting steps and contact information for assistance.
Error Codes and Their Meanings
The Aviva Plus meter utilizes error codes to signal potential problems during operation. Understanding these codes is crucial for accurate self-monitoring. For instance, an “E-1” code typically indicates a test strip error – ensure the strip is properly inserted and not damaged.
An “E-2” error often signifies an insufficient blood sample; retest with a larger drop. “E-3” usually points to a control solution issue, prompting a check of the solution’s expiration or a repeat test. Other codes may relate to internal meter malfunctions or communication errors with connected devices.
The complete user manual provides a detailed table listing all possible error codes, their specific meanings, and recommended troubleshooting steps. Always consult the manual for accurate interpretation and resolution of any error message displayed on your Aviva Plus meter. Ignoring error codes can lead to inaccurate results.

Maintaining Your Aviva Glucose Meter
Regular maintenance ensures the accuracy and longevity of your Aviva Plus meter. Avoid exposing the meter to extreme temperatures or humidity, as this can damage internal components. Do not attempt to disassemble or repair the meter yourself; this will void the warranty.
Consistent cleaning is vital. Use a soft, slightly damp cloth to wipe the exterior of the meter after each use. Avoid harsh chemicals or abrasive cleaners. Proper test strip storage is also key – keep strips in their original container, tightly sealed, and away from direct sunlight.
Regularly check the meter’s display for any signs of damage. Ensure the battery compartment is clean and free of corrosion. Following these simple maintenance steps will help maintain the reliability of your Aviva Plus meter and provide accurate blood glucose readings.
Cleaning and Disinfection Procedures
To maintain hygiene and accuracy, regularly clean and disinfect your Aviva Plus meter. Before cleaning, ensure the meter is switched off. Use a soft cloth lightly dampened with water and a mild detergent to wipe the exterior surfaces. Avoid getting any liquid into the meter’s openings.
For disinfection, use a 70% isopropyl alcohol solution on a clean cloth. Wipe the meter’s exterior, paying attention to areas that come into contact with skin. Do not saturate the cloth, and avoid spraying liquid directly onto the meter. Allow the meter to air dry completely before reinserting a test strip or using it again.
Never use harsh chemicals, abrasive cleaners, or solvents, as these can damage the meter. Regular cleaning and disinfection contribute to accurate readings and prevent the spread of infection.
Test Strip Storage and Handling
Proper storage and handling of Aviva Plus test strips are crucial for accurate results. Always store test strips in their original vial, tightly closed, in a cool, dry place. Avoid exposing them to direct sunlight, heat, or humidity. Do not store strips in a bathroom or near water sources.
Ensure the test strip vial is closed immediately after removing a strip. Do not return a used or partially used strip to the vial. Check the expiration date on the vial before each use; expired strips can yield inaccurate readings. Inspect the strips for any signs of damage or discoloration.
Handle test strips with clean, dry hands. Avoid touching the test area of the strip, as this can contaminate the sample and affect the result. Using damaged or expired strips compromises the reliability of your blood glucose monitoring.
Disposing of Used Test Strips and Lancets
Safe disposal of used Aviva Plus test strips and lancets is essential to prevent accidental needle sticks and maintain hygiene. Used test strips should be discarded in a household waste container, following your local regulations. However, used lancets are considered sharps and require special handling.
Never dispose of lancets directly into the trash. Utilize an FDA-cleared sharps container for safe disposal. These containers are puncture-resistant and designed to prevent injuries. If a sharps container isn’t readily available, use a heavy-duty plastic container with a tight-fitting, puncture-proof lid, clearly labeled “Sharps – Do Not Recycle.”
Contact your local waste management services or healthcare provider for information on proper sharps disposal locations in your area. Responsible disposal protects both you and the community from potential hazards associated with these medical devices.
Aviva Plus User Manual Download Links
Access comprehensive documentation for your Aviva Plus glucose meter directly from the manufacturer. These downloadable resources provide detailed guidance on all aspects of meter operation, troubleshooting, and maintenance. For the complete Aviva Plus Users Manual (English/Spanish), a 5.65 MB PDF file is readily available for download.
Need a quick reference? The Aviva Plus Quick Start Guide (English/Spanish), a concise 1 MB PDF, offers streamlined instructions for initial setup and basic testing procedures. Additionally, the Accu-Chek Aviva Control Solution Users Manual (3.19 MB PDF) details proper control solution usage for accuracy verification.
Further resources include the Accu-Chek Guide Me Blood Glucose Meter User Manual v2b (140 pages), offering broader insights into related devices. Find these links and more on the official Accu-Chek website, ensuring you have the latest information at your fingertips.