Bissell Steam Mop Instruction Book: A Comprehensive Guide
Welcome! This guide details Bissell steam mop operation, maintenance, and troubleshooting, covering models like PowerFresh and PowerSteamer, ensuring optimal floor care performance.
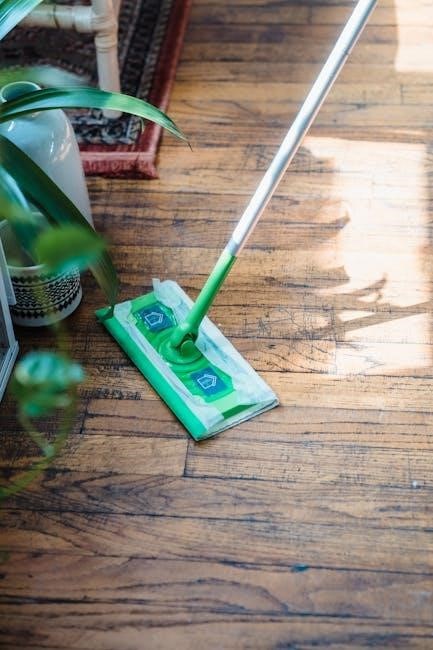
Bissell Steam Mops represent a revolutionary approach to floor cleaning, utilizing the power of steam to sanitize and refresh various hard floor surfaces. These innovative devices offer a chemical-free cleaning solution, relying solely on high-temperature steam to eliminate dirt, grime, and bacteria.

From the PowerFresh to the PowerSteamer lines, Bissell steam mops are designed for convenience and effectiveness. They provide a hygienic and efficient alternative to traditional mopping methods. Bissell’s commitment to floor care is evident in the design and construction of each model, ensuring a superior cleaning experience for every user. Discover a cleaner, healthier home with Bissell!
Understanding Your Bissell Model
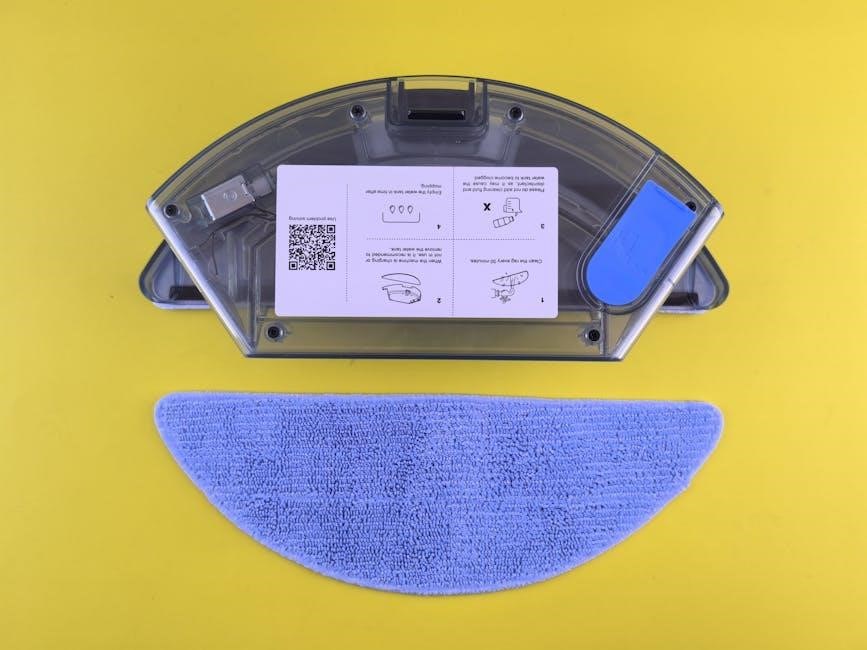
Familiarizing yourself with your specific Bissell steam mop is crucial for optimal performance. Bissell offers a diverse range of models, each with unique features tailored to different cleaning needs. Key aspects to understand include the water tank capacity (like the 0.38L capacity noted), steam level settings, and the type of cleaning pads compatible with your mop.
Knowing your model number – essential for warranty claims and accessing specific support – allows you to pinpoint relevant instructions. Explore the distinct capabilities of your Bissell, from the Lift-Off Steam Mop to the PowerFresh, and unlock its full cleaning potential.
Identifying Your Specific Bissell Steam Mop (Model Numbers)
Locating your model number is the first step to accessing tailored support and instructions. This unique identifier, often found on a sticker located on the mop’s body, is vital for warranty claims and downloading the correct user manual. Examples include models like 2685A.11.19 (PowerSteamer Heavy Duty) and potentially 1543A (Symphony Steam).
Having this number readily available ensures you receive accurate guidance for your specific Bissell steam mop, maximizing its cleaning efficiency and lifespan. Refer to your purchase documentation or the unit itself to find this crucial piece of information.

Key Features Across Bissell Steam Mop Lines
Bissell steam mops consistently offer features designed for effective floor cleaning. Many models, like the PowerFresh, utilize steam on demand for targeted cleaning power. Common elements include swivel steering for maneuverability and easy-to-attach cleaning pads. Some, such as the PowerSteamer, boast larger water tank capacities for extended use.
Antibacterial steam options, found in models like the SpotClean Turbo Antibac 33862, provide enhanced hygiene. Variable steam settings cater to diverse floor types, ensuring safe and optimal cleaning across your home. These features combine for a versatile cleaning experience.
Setting Up Your Steam Mop
Preparing your Bissell steam mop for use is straightforward. First, carefully remove the mop from its packaging and inspect all components. The initial setup involves filling the water tank with distilled or filtered water – avoid tap water to prevent mineral buildup. Ensure the tank is securely fastened to the mop body.
Next, attach the appropriate cleaning pad to the mop head. Bissell offers various pad types for different floor surfaces. Proper pad attachment is crucial for effective cleaning and to prevent issues during operation. Always refer to your specific model’s guide.
Filling the Water Tank
Proper water tank filling is vital for your Bissell steam mop’s performance and longevity. Always unplug the mop before filling. Locate the water tank, usually at the rear or side of the unit, and detach it. Use only distilled or filtered water to minimize mineral deposits and maintain steam production.
Fill the tank to the indicated maximum fill line – overfilling can cause leakage. Securely reattach the tank to the mop body, ensuring a tight seal. Incorrectly seated tanks can lead to steam escaping improperly during operation, impacting cleaning effectiveness.
Attaching the Cleaning Pads
Correct cleaning pad attachment ensures effective floor cleaning and prevents damage. Bissell steam mops utilize various pad attachment methods, typically involving loops, straps, or clips. Ensure the mop is cool and unplugged before attaching or removing pads.
Align the pad with the mop head and secure it firmly using the designated attachment system. A snug fit is crucial to prevent the pad from detaching during use. Regularly check pad attachment before and during cleaning to maintain optimal performance and avoid scattering debris.
Operating Instructions
Before first use, carefully review all safety precautions. Fill the water tank with distilled or filtered water – tap water can cause mineral buildup. Power on the steam mop using the designated power button. Allow a short warm-up period for the mop to generate steam.
Select your desired steam level based on the floor type (see section on floor types). Maneuver the mop in smooth, overlapping strokes, allowing the steam to loosen dirt and grime. Always unplug the mop when not in use and allow it to cool completely.
Powering On and Off
To power on your Bissell steam mop, locate the clearly marked power button – typically found on the handle or mop head. Press the button firmly until an indicator light illuminates, signifying the unit is receiving power. Allow the mop a brief warm-up period, usually 20-30 seconds, to generate steam.
To power off, press the power button again. The indicator light should extinguish. Always unplug the mop from the electrical outlet when not in use, even after powering it off via the button, for complete safety.
Steam Level Selection
Bissell steam mops often feature adjustable steam settings, allowing customization for various floor types. Typically, a dial or buttons control these levels – Low, Medium, and High. Low steam is ideal for delicate surfaces like laminate, while Medium suits tile and sealed hardwood.
High steam provides maximum cleaning power for stubborn messes on durable tile or grout. Always consult the “Cleaning Different Floor Types” section before selecting a steam level to avoid damage. Start with the lowest setting and increase as needed.
Maneuvering and Cleaning Techniques
Effective steam mopping involves overlapping strokes for complete coverage. Move the mop slowly, allowing the steam to penetrate dirt and grime. For stuck-on messes, hold the mop stationary over the area for a few seconds.
Pivot the mop head easily to navigate around furniture and into corners. Utilize the swivel steering feature, if equipped, for enhanced maneuverability. Regularly check and replace the cleaning pad to maintain optimal cleaning performance and prevent re-depositing dirt.
Cleaning Different Floor Types
Bissell steam mops are versatile, but floor type matters! For hardwood, use the lowest steam setting and a microfiber pad to prevent damage. Tile and grout benefit from higher steam levels and focused cleaning on grout lines.
Laminate floors require caution; use low steam and avoid prolonged exposure to moisture. Always test in an inconspicuous area first. Avoid using scented cleaning solutions, as they may leave residue. Proper technique ensures effective cleaning without compromising your floor’s finish.
Hardwood Floors: Safe Steam Settings
Protect your hardwood! Always begin with the lowest steam setting on your Bissell steam mop. Utilize a clean, dry microfiber pad – avoid abrasive pads. Move the mop continuously, preventing prolonged heat exposure to any single spot.
Test in an hidden area first to confirm compatibility. Avoid excessive moisture; hardwood is susceptible to water damage. Regularly inspect the pad for debris to prevent scratching. Proper steam control and pad selection are crucial for maintaining hardwood’s beauty and longevity.
Tile and Grout Cleaning
Revitalize your tile! Bissell steam mops excel at cleaning tile and grout. Utilize a slightly higher steam setting than for hardwood, but always test first. Focus on grout lines, employing slow, deliberate movements. The steam effectively loosens dirt and grime embedded within the grout.
Regularly change the cleaning pad to avoid spreading dirt. For heavily soiled grout, pre-treat with a tile and grout cleaner before steaming. Ensure proper ventilation during use. Steam cleaning is a safe and effective method for maintaining sparkling tile floors and grout.
Laminate Floors: Recommended Practices
Protect your laminate! Always use the lowest steam setting when cleaning laminate floors. Excessive moisture can cause warping or damage. Test in an inconspicuous area first to ensure compatibility. Avoid leaving the steam mop in one spot for too long; continuous movement is key.
Use only Bissell-approved microfiber pads designed for delicate surfaces. Do not use harsh chemicals or abrasive cleaners. Ensure the pad is clean and free of debris before each use. Proper care will maintain the beauty and integrity of your laminate flooring.
Maintenance and Care
Keep your Bissell performing optimally! Regular maintenance extends the life of your steam mop. After each use, allow the mop to cool completely before emptying the water tank and wiping down the exterior. Periodically descale the unit to remove mineral buildup, following the instructions in this manual.
Replace cleaning pads frequently for hygienic cleaning. Check filters regularly and replace as needed. Proper care ensures consistent steam output and prevents damage. Ignoring maintenance can void your warranty, so prioritize these steps!
Cleaning the Steam Mop After Use
Post-cleaning care is crucial! Always unplug your Bissell steam mop and allow it to cool down completely before any cleaning procedures. Empty any remaining water from the tank to prevent mildew. Wipe down the mop’s exterior with a damp cloth – avoid harsh chemicals.
Inspect the cleaning pad attachment point for debris. Rinse or replace the cleaning pad as needed. Proper post-use cleaning maintains hygiene and ensures optimal performance for your next cleaning session, extending the lifespan of your device.
Descaling the Steam Mop
Mineral buildup requires descaling! Over time, mineral deposits from water can accumulate inside your Bissell steam mop, reducing its efficiency. Descale every 3-6 months, or more frequently if you have hard water. Use a descaling solution specifically designed for steam mops, following the product’s instructions carefully.
Typically, this involves running the solution through the steam cycle. Afterwards, run clean water through the mop several times to rinse thoroughly. Regular descaling ensures consistent steam production and prolongs the life of your appliance.
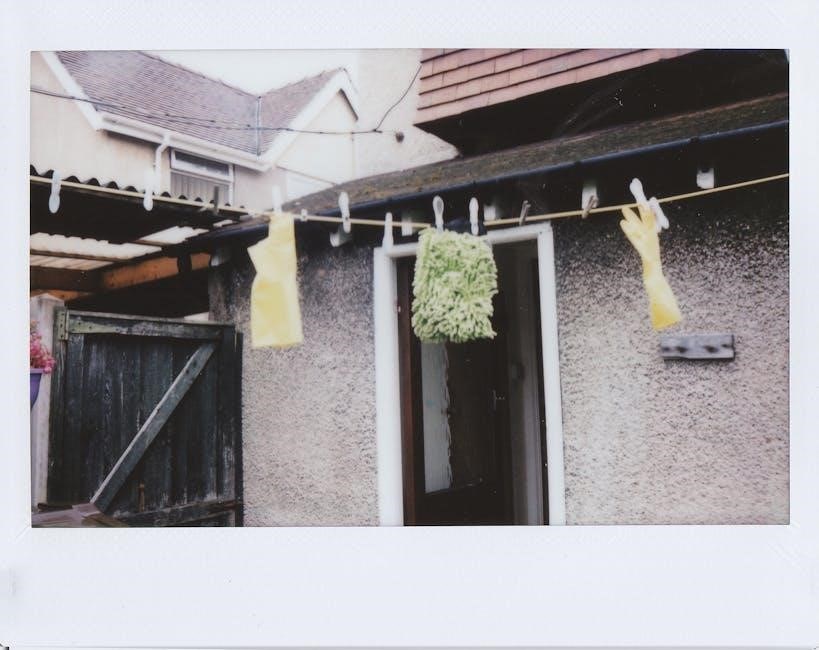
Replacing Cleaning Pads and Filters
Maintain peak performance! Regularly replacing cleaning pads is crucial for hygienic and effective floor cleaning. Pads should be replaced every 3-6 months, or sooner if visibly worn or damaged. Bissell offers various pad types for different floor surfaces – microfiber for general cleaning, and specialized pads for delicate surfaces.
Some models also include filters that require periodic replacement. Check your model’s specific instructions for filter location and replacement frequency. Using fresh pads and filters ensures optimal steam mop functionality and prevents the spread of dirt and bacteria.
Troubleshooting Common Issues
Encountering problems? This section addresses frequent concerns. If your steam mop isn’t heating, ensure it’s properly plugged in and the power switch is engaged. Water leakage often indicates an overfilled tank or a damaged seal – check both. A cleaning pad not attaching correctly usually means incorrect alignment or debris obstructing the attachment point.
For persistent issues, consult the full manual or Bissell’s support website. Avoid disassembling the mop beyond recommended maintenance procedures, as this could void your warranty.
Steam Mop Not Heating Up
No heat? First, verify the unit is securely plugged into a functioning outlet. Confirm the power switch is in the “on” position; some models have a separate heating indicator light. Check if the water tank is adequately filled – insufficient water prevents steam generation. Ensure the mop head is correctly attached, as a safety mechanism may disable heating if improperly connected.
If the issue persists, try a different outlet to rule out electrical problems. A faulty heating element may require professional repair or replacement.
Water Leaking from the Mop
Leaking water? Initially, ensure the water tank is not overfilled; exceeding the maximum fill line can cause spillage. Inspect the tank for cracks or damage, and replace if necessary. Verify the tank is properly seated and locked into place within the mop body. Examine the connection point between the mop head and the main unit for any looseness or damage.
A clogged steam channel can also increase pressure, leading to leaks. Descale the unit regularly to prevent buildup. If leaks continue, contact Bissell support.
Cleaning Pad Not Attaching Properly
Difficulty attaching the pad? First, confirm you’re using the correct pad type for your Bissell model – microfiber for general cleaning, specialized pads for specific floors. Ensure the mop is completely powered off and cooled down before attempting pad changes. Inspect the pad attachment points on both the mop head and the pad itself for any debris or damage.
Proper alignment is crucial; the pad should snap firmly into place. If it’s still loose, try a different pad to rule out a manufacturing defect;
Safety Precautions
Prioritize safety! Always unplug your Bissell steam mop before performing any maintenance or troubleshooting. Never direct steam towards people, pets, or electrical outlets. Hot steam and surfaces can cause burns – exercise extreme caution during operation and allow sufficient cool-down time before handling.
Inspect the power cord regularly for damage and discontinue use if any are found. Keep the mop away from children and ensure proper ventilation during use. Avoid using harsh chemicals or abrasive cleaners on your Bissell steam mop.
General Safety Guidelines

Read all instructions before using your Bissell steam mop. This appliance is for indoor household use only. Do not operate with a damaged cord or plug. To avoid electrical shock, do not immerse the mop, cord, or plug in water or other liquids.
Close supervision is necessary when the appliance is used near children. Use only genuine Bissell cleaning pads and solutions. Never leave the steam mop unattended while it is plugged in or operating. Always allow the mop to cool completely before storing.
Avoiding Burns and Electrical Hazards
Hot steam is released during operation – avoid directing it towards yourself, others, or pets. Do not touch the steam nozzle or hot surfaces. Unplug the mop before filling, emptying, or cleaning. Never operate the steam mop with wet hands.

Ensure the power cord is not damaged and avoid using extension cords. Do not use outdoors or on wet surfaces. Keep the steam mop away from flammable materials. Allow all surfaces to cool before touching them after use, preventing accidental burns.
Bissell Warranty Information
Your Bissell steam mop is covered by a limited warranty against defects in materials and workmanship. Warranty length varies by model; refer to your specific product documentation for details; This warranty covers functional parts and labor for specified periods.

Damage due to misuse, abuse, or unauthorized repairs is not covered. To claim warranty service, retain your proof of purchase and contact Bissell customer support. Warranty service options may include repair or replacement, at Bissell’s discretion.
Understanding Your Warranty Coverage
Bissell’s warranty typically covers defects in materials and workmanship under normal household use. The coverage period differs based on the specific steam mop model purchased – check your documentation! It generally doesn’t include issues arising from improper maintenance, like failing to descale, or accidental damage.
The warranty aims to repair or replace defective parts, not the entire unit, at Bissell’s choice. Shipping costs for warranty claims may apply. Keep your original purchase receipt as proof of date and location.
How to Claim Warranty Service
To initiate a warranty claim, first, visit the official Bissell website and locate the “Support” or “Warranty” section. You’ll likely need your model number and proof of purchase (receipt). Bissell may request photos or videos demonstrating the defect.
You can then submit a claim online or contact Bissell’s customer service via phone or email. They will provide instructions for returning the unit or authorized repair locations. Be prepared to cover initial shipping costs, potentially reimbursed upon verification.