Ge Adora Dishwasher Manual: A Comprehensive Guide
This manual assists users in maximizing their Ge Adora dishwasher’s potential. It covers installation, operation, maintenance, and troubleshooting, ensuring optimal performance and longevity.
Welcome to the world of convenient dishwashing! Your Ge Adora dishwasher is designed for efficient and reliable performance, offering a range of features to simplify your kitchen routine. This appliance represents a blend of innovative technology and user-friendly design, aiming to deliver sparkling clean dishes with minimal effort.
This manual serves as your comprehensive guide to understanding and operating your new dishwasher. Whether you’re a first-time user or familiar with dishwashing appliances, this resource will provide valuable insights into its functionalities, proper usage, and maintenance procedures. We’ll cover everything from initial setup and loading techniques to troubleshooting common issues.
The Ge Adora is more than just a kitchen appliance; it’s an investment in your time and convenience. By following the instructions outlined in this manual, you can ensure years of dependable service and consistently spotless results. Let’s begin your journey to effortless dish care!
Understanding Your Dishwasher’s Features
The Ge Adora dishwasher boasts a suite of features designed for optimal cleaning and convenience. Key components include adjustable racks to accommodate various dish sizes, powerful spray arms ensuring thorough water coverage, and a filtration system to remove food particles. Different wash cycles – such as Normal, Heavy, and Delicate – cater to diverse cleaning needs.
Advanced options like heated drying and sanitize cycles enhance performance. The control panel allows for easy selection of cycles and modifications, often featuring a digital display for cycle status. Some models integrate with smart home systems, enabling remote control via apps or voice commands (like Google Nest/Cync integration).
Understanding these features is crucial for maximizing your dishwasher’s efficiency. Familiarize yourself with the rack adjustments, cycle options, and control panel functions to tailor each wash to your specific load. Proper utilization of these features will result in consistently clean and sparkling dishes, while also conserving water and energy.

Installation and Setup
Proper installation is vital for optimal performance. This section details initial steps, water and electrical connections, and crucial safety precautions for your Ge Adora dishwasher.
Initial Installation Steps
Before beginning, ensure you have all necessary tools: a screwdriver, pliers, level, and adjustable wrench. Carefully unpack your Ge Adora dishwasher, inspecting for any shipping damage. Remove all packing materials, including tape and protective films, from both the interior and exterior. Position the dishwasher in its designated space, leaving adequate clearance for water and electrical connections, as well as for future servicing.
Use a level to confirm the dishwasher sits evenly on the floor. Adjust the leveling legs as needed to achieve a stable and balanced position. This prevents excessive vibration during operation. Next, connect the drain hose to the household drain, ensuring a secure fit to prevent leaks. Finally, prepare for the water supply connection and electrical hookup, adhering to local plumbing and electrical codes for a safe and compliant installation.
Water Supply Connection
Connect the dishwasher’s water inlet hose to a hot water supply line, typically ½ inch in diameter. Using hot water improves cleaning performance. Ensure the water pressure falls within the recommended range (typically 20-120 psi) to prevent damage to the dishwasher’s internal components. A shut-off valve should be installed on the water supply line for easy maintenance and emergency shut-off.
Carefully tighten the connection using an adjustable wrench, avoiding over-tightening which could strip the threads. Check for leaks at the connection point after turning on the water supply. If leaks are present, tighten the connection further or replace the water supply hose. Always follow local plumbing codes and consider using Teflon tape on the threads for a watertight seal. Proper water connection is crucial for optimal dishwasher function.
Electrical Connection and Safety
The Ge Adora dishwasher requires a dedicated 120V, 60Hz electrical circuit, protected by a 15-amp or 20-amp circuit breaker. Never use an extension cord; the dishwasher must be directly connected to a grounded electrical outlet. Ensure the outlet is easily accessible for disconnection in case of emergencies.
Before any electrical work, disconnect power at the circuit breaker. Improper grounding can lead to electric shock. If you are unsure about electrical connections, consult a qualified electrician. Do not attempt repairs yourself if you lack electrical expertise. The dishwasher’s power cord should be inspected regularly for damage. Replace a damaged cord immediately. Always follow local electrical codes and safety regulations during installation and operation.
Operating Instructions
Proper dishwasher operation involves correct loading, detergent use, cycle selection, and utilizing available options for optimal cleaning and efficiency.
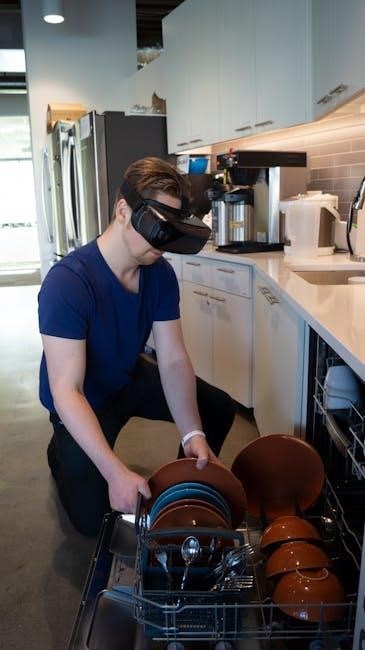
Loading the Dishwasher Correctly
Achieving optimal cleaning results with your GE Adora dishwasher relies heavily on proper loading techniques. Begin by removing large food particles from dishes before loading. Position items so water reaches all surfaces; avoid overcrowding, which hinders water circulation.
Place pots, pans, and larger items on the bottom rack, facing the center. Glasses and cups should be placed on the upper rack, ensuring they don’t obstruct the spray arm. Silverware goes in the basket with handles down for thorough cleaning.
Avoid nesting dishes or blocking the detergent dispenser. Check that the spray arms can rotate freely after loading. Incorrect loading can lead to poorly cleaned dishes and reduced dishwasher performance. Refer to the diagrams within this manual for visual guidance on optimal rack arrangement.
Detergent Usage and Recommendations
Using the correct type and amount of detergent is crucial for effective dishwashing with your GE Adora. Always use dishwasher detergent specifically formulated for automatic dishwashers – hand soap will create excessive suds and damage the machine.
Powder, gel, or pods are all acceptable, but follow the detergent manufacturer’s instructions for proper dosage. The amount needed depends on water hardness and soil level. Overusing detergent can leave residue on dishes, while underusing may result in poor cleaning.
Fill the detergent dispenser before each cycle, ensuring it closes securely. For hard water, consider using a rinse aid to prevent spotting and filming. Regularly check the detergent packaging for updated recommendations and adjust usage accordingly to maintain optimal cleaning performance and protect your dishwasher.
Selecting Wash Cycles
Your GE Adora dishwasher offers a variety of wash cycles to accommodate different dishwashing needs. The Normal cycle is ideal for everyday loads with moderate soil levels. For heavily soiled dishes, utilize the Heavy Duty cycle, which provides a more intense wash.
A Light/China cycle is designed for delicate items and lightly soiled dishes, using a gentler wash action. The Quick Wash cycle offers a faster cleaning option for lightly soiled loads when time is limited. An Auto cycle intelligently adjusts wash parameters based on soil sensors.
Refer to the control panel for specific cycle details and estimated run times. Selecting the appropriate cycle ensures efficient cleaning, conserves water and energy, and protects your dishes from damage. Always consider the type and level of soil when choosing a cycle.

Using Options and Modifications
The GE Adora dishwasher provides several options to customize wash cycles for specific needs. The High Temp Wash option increases water temperature for enhanced sanitation, ideal for baby bottles or heavily soiled items. A Sanitize option utilizes a higher temperature to eliminate bacteria.
The Delay Start feature allows you to schedule the dishwasher to run at a later time, potentially taking advantage of off-peak energy rates. A Heated Dry option ensures thorough drying, while Energy Saver reduces energy consumption by disabling heated drying.
Some models may include a Sani Rinse option for extra rinsing. Explore the control panel to discover all available modifications. Combining these options with appropriate wash cycles optimizes cleaning performance and caters to individual preferences. Refer to the full manual for detailed explanations of each feature.

Maintenance and Troubleshooting
Regular cleaning and prompt troubleshooting are vital for a long-lasting, efficient GE Adora dishwasher. Address issues quickly to prevent further damage and maintain performance.
Cleaning the Dishwasher Interior
Maintaining a clean dishwasher interior is crucial for optimal performance and hygiene. Regularly wipe down the door, seals, and spray arms with a damp cloth and mild detergent. Avoid abrasive cleaners, as they can damage the stainless steel or plastic components.
For stubborn stains or buildup, a dishwasher cleaner specifically designed for GE Adora models is recommended. Run an empty cycle with the cleaner according to the product instructions. This helps dissolve food particles and eliminate odors.
Pay close attention to the detergent dispenser, ensuring it’s free of residue. Inspect the interior for any visible mold or mildew, and clean thoroughly with a bleach solution (diluted appropriately) if necessary. A clean interior contributes to sparkling clean dishes and extends the life of your appliance.
Filter Cleaning Procedures
Regular filter cleaning is essential for preventing clogs and ensuring efficient dishwasher operation. Locate the filter assembly, typically at the bottom of the dishwasher interior. Remove the lower rack to access it easily.
Twist and lift the filter components – usually a cylindrical filter and a flat mesh filter – to remove them. Rinse thoroughly under running water, using a soft brush to dislodge any trapped food particles or debris. Inspect for damage and replace if necessary.
Reassemble the filter components correctly, ensuring a secure fit. A poorly fitted filter can allow food particles to recirculate, reducing cleaning performance. Consult your GE Adora dishwasher manual for specific filter diagrams and reassembly instructions. Cleaning the filter monthly, or more frequently with heavy use, will maintain optimal performance.
Common Error Codes and Solutions
Your GE Adora dishwasher utilizes error codes to signal malfunctions. A flashing light often accompanies these codes. Code “F1” typically indicates a water temperature issue – check your water heater setting. “F2” suggests a drainage problem; inspect the drain hose for kinks or clogs.
If you encounter “F9,” it usually points to a water inlet valve failure, potentially requiring replacement. “F10” often signals a problem with the float switch, which may need cleaning or replacement. Always disconnect power before attempting any repairs.
Consult your GE Adora dishwasher manual for a complete list of error codes and their corresponding solutions. If an error persists after troubleshooting, contact a qualified appliance repair technician. Ignoring error codes can lead to further damage and costly repairs. Remember safety first – always disconnect power!
Troubleshooting Performance Issues
Poor cleaning performance often stems from improper loading. Ensure dishes aren’t blocking the spray arms. Check the spray arms themselves for clogs – remove and rinse thoroughly. Low water temperature can also hinder cleaning; verify your water heater is set to at least 120°F.
If dishes remain wet after a cycle, the rinse aid dispenser might be empty or set too low. Cloudy glassware could indicate hard water; consider using a rinse aid or dishwasher cleaner. Unusual noises may signal a foreign object in the pump – inspect the filter and lower spray arm.
Persistent issues require further investigation. Check the detergent dispenser for blockages and ensure you’re using the correct type and amount of detergent. Refer to your manual for specific recommendations. If problems continue, professional service may be needed.

Parts Diagram and Replacement
Locate key components with the detailed diagram. Easily source replacements for optimal function and longevity of your Ge Adora dishwasher, ensuring continued performance.
Identifying Key Components
Understanding the internal structure of your Ge Adora dishwasher is crucial for both maintenance and potential repairs. Key components include the spray arms – responsible for water distribution – and the filter system, vital for trapping food particles. The pump motor drives the water circulation, while the heating element ensures proper water temperature for effective cleaning.
The control panel houses the electronic controls, and the door latch mechanism secures the dishwasher during operation. The water inlet valve regulates water flow, and the drain pump expels wastewater. Familiarize yourself with the location of these parts using a detailed parts diagram (often found inside the dishwasher or online). Knowing these components will simplify troubleshooting and replacement procedures, ultimately extending the life of your appliance.
Always disconnect power before attempting any inspection or repair. Refer to the full manual for specific diagrams and safety precautions.
Sourcing Replacement Parts
When replacement parts are needed for your Ge Adora dishwasher, several avenues are available. Official GE Parts websites are a reliable source, guaranteeing compatibility and quality. Many online appliance parts retailers also stock a wide range of components, often at competitive prices. Local appliance repair shops frequently carry common parts like spray arms, filters, and door latches.
Before ordering, always have your dishwasher’s model number readily available. This ensures you receive the correct part. When searching online, use precise keywords like “Ge Adora dishwasher [part name]” for accurate results. Compare prices and shipping costs across different vendors.
Be cautious of generic or non-OEM (Original Equipment Manufacturer) parts, as their quality may vary. Prioritize genuine GE parts whenever possible for optimal performance and longevity. Always verify return policies before purchasing.
Safety Precautions for Repair
Attempting repairs on your Ge Adora dishwasher can be hazardous if proper safety measures aren’t followed. Always disconnect the dishwasher from both the electrical supply (breaker box) and the water supply before beginning any work. Water and electricity are a dangerous combination.
Wear appropriate personal protective equipment (PPE), including safety glasses and work gloves, to protect against sharp edges and potential chemical exposure. Be mindful of hot surfaces, especially after recent use. If dealing with the heating element, ensure it has completely cooled down.
If you are uncomfortable or lack experience with appliance repair, it is strongly recommended to contact a qualified appliance repair technician. Improper repairs can lead to further damage, injury, or void your warranty. Never bypass safety features or attempt to modify the dishwasher’s electrical system.